|
|
|
|
 |
| |
Super Mario RPG Walkthrough (SNES)
|
Walkthrough has been completely retyped.
|
| |
|
Bowser's Keep |
|
Well, time to start. Beware, by
starting, you are now beginning
the best Mario game created,
with the deepest storyline, best
music, best graphics, and so on.
~ Enjoy
Sorry, I just had to say that.
Anyways, back to Bowser's Keep,
the first level. "Sorry Mario,
but the Princess is in another
castle." One of the greatest
lines in gaming history.
However, it's not going to apply
to us, because Toadstool (Not
Peach, she is Toadstool in this
game) is actually in this
castle. Time to save her
The first things you notice:
1) What the heck is this? I'm
not moving left to right!
2) Wow...pretty graphics!
Just take it in, it's a good
thing. Anyways, head straight
through the first door. You'll
notice you are now in a
different Area. In this game,
doors and little square sectors
(like the one behind Mario at
the start of the level) separate
levels into different places,
which I call areas. The term
will be used through the
walkthrough, so it's good to
know.
So, the first area is complete.
In this next part, you're going
to see a Terrapin, which is the
1st enemy you see in the game.
To fight them in a battle, you
simply need to touch them.
Whether or not you want to is up
to you. I would recommend it,
just so you can see how the
battle system is set up in its
simplest form. When you come to
the end of this area, you have
to fight some Terrapins. You'll
see them, they'll be guarding
the door. Approach them to get
in a battle.
This battle is simple, but this
is a good time to explain the
battle system. You have 4
options to use: A, B, X, Y.
A: Normal attack. Uses equipped
weapons.
B: Defend or run away. Defend
makes you take less damage.
However, you can't always run
X: Once you get an item, you'll
be able to use it with X (Later
explained by Toad)
Y: Special! Each character gets
special moves. These are more
powerful, and they're just cool
=P
For this battle, just use your
normal attack. These guys are
simple, no problem. After you're
finished, simply keep heading
straight to the next area. Here,
you'll be in an area with some
lava and some bridges. Just go
across them and through the door
Keep going forward until Mario
stops walking. He'll look up... |
| |
|
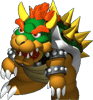
Bowser (Area Boss) |
|
 |
Boss Info |
Party Info |
|
»
HP: Infinite |
»
Minumum Level: 1 |
|
»
Coins: 0 |
»
Recommended Level: 1 |
|
»
Experience Points: 0 |
»
Recommended Party: Mario |
| |
|
|
|
Bowser, the first boss. He's
actually quite simple, despite
the fact that he has infinite
HP. If you notice, Mario/Bowser
are battling on chandeliers.
Each is held up by a Kinklink -
taking out these will drop the
chandelier. That's what you need
to do - attack the Kinklink. You
can either use your normal
attacks, or you can try your
special attacks. Soon after, the
chandelier will fall, and a cut
scene will start to take
place... |
| |
|
Mario's Pad |
|
Boing! Well, Mario has now been
shot out of the castle and lands
within his house. Talk about a
lucky shot. Anyways, Mario's
good buddy Toad is there to pick
up Toadstool. After he's done
talking, simply press B to jump
off the little rack Mario is on.
Then, head outside.
This place isn't big, it's just
Mario's house. Toad's there, so
go up and talk to him. He'll
rant about Bowser kidnapping
Toadstool again, and he'll
finish up by telling you to go
get her. After he's done, you
can try to leave, but Toad will
stop you.
Now, Toad is explaining the Save
Points. Save your game, and head
out of the place. Whenever you
save is up to you, but it's best
to save at every new place. |
| |
|
Bowser's Keep |
|
On the map, go to Bowser's Keep.
Enter, and you'll see a giant
sword. He'll mention he is part
of the "Smithy Gang" and then
he'll take out the bridge. This
is basically a cut screen, but
you'll notice that afterwards,
there is a new level called
Vista Hill.
Don't worry about it, Vista Hill
is just where you can look at
Bowser's Keep. You can't go to
Bowser's Keep now because the
bridge is out. With that in
mind, it's time to go back and
see Toad |
| |
|
Mario's Pad |
|
Well, we're back here already.
Toad's now inside, and that's
where you need to go. Once
inside, talk to Toad.
Now, Mario's...well, acting.
After he's done, Toad will say
that you need to go back to the
Mushroom Kingdom to tell the
Chancellor about this dilemma.
Head outside, and leave. Only
problem is, you can't.
When you try to leave, Toad will
"bump" Mario, and Mario will
lose 1 HP. He'll give you a
Mushroom to heal, and offer to
explain about items. If you want
to know more about items, do it.
If not, don't, and you'll get an
extra Mushroom (1 Mushroom will
be used in Toad's explanation).
After you are done with the item
explanation, Toad's going to
want to explained Timed Hits. I
recommend doing this, because it
is very, very useful.
After the tutorial, go and save,
and then go out of Mario's Pad.
On the map, head to Mushroom
Way. |
| |
|
Mushroom Way |
|
Mushroom Way is the first true
level of the game. No help from
tutorials, no stoppages in play.
Nothing more than just straight
up gameplay.
The path is very, very simple -
it's almost one way. To start,
head down and to the right.
Fight some battles; experience
will be gained and it'll help to
learn the controls better. A
treasure chest will be near
there - coins are inside, so
stop for a second and get those.
Continue on and you'll see Toad
pinned up by a Goomba. You do
not have to save him, but it's
smart to do so. Enter the battle
and you'll be fighting a duo of
Goombas. It's not supposed to be
a hard battle, so don't make it
one: just defeat them.
Because Toad is as generous as
he is, he'll give you a Honey
Syrup. Honey Syrups restore 10
FP. FP is Flower Points, which
allow the party to use Special
Attacks. For instance, Mario's
Jump takes 3 FP. Since a player
starts with 10, Jump can be used
3 times before FP needs to be
replenished.
FP can become very important
later on, so it's good to know
how it works!
Anyways, after saving Toad, get
the treasure box to the right
and head on up through the next
area. This area is a bit
different, and a whole lot more
greener! Enemies are all over,
and some of the land is raised.
So, how does a player get onto
the elevated rocks? It's not so
hard actually. Take out the
Goomba that is on the spinning
flower and jump on it. The
flower propels Mario to a higher
jump in the direction he's
facing.
We want to go to the rock on the
furthest right point, so head on
up there. You'll see a
Paratroopa there holding our
good friend Toad. Seriously, how
does Toad get caught like that?!
Take out the Paratroopa to save
Toad once more, and this time,
he'll give a Flower Tab as a
reward. Flower Tabs permanently
raise Mario's FP by 1, and they
are very valuable, so it was
worth saving Toad again!
To the right will be a treasure
chest and the gateway to the
next area. Inside the chest is a
Mushroom, but it's a different
kind of Mushroom. It is not an
item - it restores all HP and FP
on the field. Heal up and
proceed.
This is the final area of
Mushroom Way. A Lakitu will be
throwing Spikeys on the ground,
the hardest enemy up to this
point in terms of how much
damage they do. The exit is in
the far bottom right, so either
go down and to the right or to
the right and then down. You'll
notice that Toad's been captured
for a third time... |
| |
|
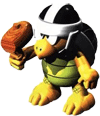
Hammer Bros. (Area Boss) |
|
 |
Boss Info |
Party Info |
|
»
HP: 50 (Each) |
»
Minimum Level: 2 |
|
»
Coins: 10 |
»
Recommended Level: 2 |
|
»
Experience Points: 3 |
»
Recommended Party: Mario |
| |
|
|
|
There's 2 Hammer Bros. to take
care of, and they're not your
typical first boss that's found
in most video games. Hopefully a
level was gained during the
course of Mushroom Way, because
it'll help greatly. The battle
starts with Mario attacking;
Pick one and only one to attack.
Hammer Bros attack regularly and
with Hammer Throw, a stronger
move. Both are powerful, so
Timed Hits become a key to
winning
We need to take care of one
before even touching the other.
I will generally attack the left
one first - they have no
differences, it's just where the
cursor starts. Use Jump once to
inflict massive damage and then
a regular attack to finish him
off.
Once the first one has vanished,
the second one will use Valor
Up, a move to increase its
defense. Good thing 2 Jumps were
saved - expel both and finish
him up with an A move. At any
point, heal if needed in case
Timed Hits aren't working that
well.
Item received after battle:
Flower Jar
-----End of Boss Battle-----
Now that the Hammer Bros. are
defeated, notice a Hammer that
was left behind. Toad'll notice
it for sure, since he goes and
gives it to you. This is Mario's
first weapon and can be equipped
on the Menu Screen. Do not
forget to equip it right away!
Exit Mushroom Way to the right.
On the map, head right once more
to the Mushroom Kingdom |
| |
|
Mushroom Kingdom |
|
Finally, we're at the Mushroom
Kingdom! There's a lot to do
here, so let's start with
saving. Follow the path to the
right until a building with a
spinning star comes into view.
All of the buildings with this
symbol in the game are Inns, and
they contain the save points.
Save the game, exit the
building.
To the right of the Inn is a
building with a spinning
mushroom - these are the
item/weapon shops. The spinning
mushroom is their symbol, just
as the star is for Inns. This
Item Shop will sell us soome new
armor, but before we buy that,
head downstairs. The man down
there will give you instructions
and you'll learn about hidden
treasure chests. There's
actually another one in here,
but I'll leave that up to
you to find.
This one contains a flower - it
does the same thing as a Flower
Tab.
After the tutorial, head out of
this building. Talk to some
people in the town, explore
around, even if there isn't much
to explore! Once your ready to
continue, head up to the
building at the top of the
screen, but do not enter it.
Why are we not entering it?
Because there is a one-time only
thing to happen, which needs to
be explained. Once the building
is entered and Toad talks to
Mario, he will run forward. Jump
on his head and when he reached
the door, jump above it to get a
hidden treasure box. This is the
only time in the game that this
box can be obtained. It contains
a Frog Coin, which is a currency
used by special shops
With that in mind, enter the
castle and follow Toad. He'll
lead you straight to the
Chancellor. Approach him, and
Mario will start to do his
acting again, explaining what
happened before. Mario does a
great job of impersonating
others, doesn't he?
After the explanation, try to
walk out. If you have not
equipped the Hammer, he'll stop
you and ask Toad to demonstrate.
If you have, he'll stop you
anyways and give you a Map,
which shows all of places Mario
has been and will go to
...And then the Chancellor will
stop Mario one more time, which
will shock Mario and make him
fall down the stairs! He'll
mention the cellar, which is
exactly where we need to be. The
cellar is the room to the right
of the hall where we jumped on
Toad's head.
Talk to the Toad on the stairs,
get the treasure chests, and go
to the main hallway again. Exist
the castle, and there'll be a
fluffy guy chasing a purple
crocodile. The fluffy guy will
jump into a ledge and reveal
that his grandpa's coin was
stolen. He'll cry, it'll rain.
Run down and talk to him. He'll
stop the rainstorm, explain what
happened, and tell you his name
is Mallow. After you agree to
help him, he'll join your party!
Now that we've got Mallow, save
in the Inn, and head to the Item
Shop; the vendor will start to
retrieve an item that they were
going to trade for. Well, that's
not to be, because Mallow tells
him the story and that Mario
will help him get the coin back.
The vendor will give you a Pick
Me Up.
That's nice and all, but we need
a few more, preferably 4 more.
Pick Me Up's revive KO'd
partners, so their very, very
valuable. Also, buy the Shirt
and the Pants. Throughout the
game, Mario's armor will always
be a Shirt, and Mallow's will
always be Pants. Each character
has their own item of armor.
Equip both and exit the item
shop. See the resident jumping
up and down to the right? Talk
to him and a scene will start
and end with the crocodile
running past everyone. Exit the
level to the right. On the map,
a new area will be below the
Mushroom Kingdom - Bandit's Way.
That's where we need to be |
| |
|
Bandit's Way |
|
Once entering Bandit's Way, a
little "scene" with the purple
crocodile and Mallow will start.
You'll learn his name is Croco
and he'll realize that Mario is
chasing him. He'll run off after
the scene.
And that leads us to our
objective: Catch Croco. We can't
actually catch him to the end of
the level, but he does lead us
through it quite easily. First,
follow him down the left side
and you'll reach a save point;
it's a good time to save the
game. Continue on and the next
area will come up quickly.
Croco will be "caught" again
like at the beginning of the
last area, and he'll start
running again. Use the spinning
flowers like in Mushroom Way to
reach the elevated parts of the
levels. Use the yellow blocks to
traverse the gap from rock to
rock. When you get the to the
end, there'll be the entrsance
to the next area and a spinning
flower.
Instead of going to the next
area right away, jump on the red
spinning flower and jump towards
the blue flower. You'll hit a
hidden treasure box containing a
Kerokero Cola. It's a very
useful item, so it's good to
have. Proceed to the next area,.
In this area, Croco will be
there again. Just follow him
through by heading up. Croco
will pause occasionally and
start running again. The next
area isn't far off after that,
so proceed through to it!
This area is great for growing
levels. Why? Well, Croco runs
away, continue to get the
treasure chest like he was
trying to. You'll become
inincible with a star - hit as
many K-9's as possible because
experience is gained for
everyone taken down. Hopefully,
Mario/Mallow will grow in the
process. There's another chest
as well, which will yield a
flower. The entrance to the next
area is in the bottom right.
This is the last area of
Bandit's Way. It's a dead end,
so Croco will go into hiding.
The treasure chest at the
beginning wil lgive you a
mushroom to heal the party.
Continue downwards; Croco will
hide behind the hills and
plants. Approach him from behind
(it must be from behind) 3
times, and you'll enter a battle
with him |
| |
|
Croco (Area Boss) |
|
 |
Boss Info |
Party Info |
|
»
HP: 320 (Each) |
»
Minimum Level: 3 |
|
»
Coins: 10 |
»
Recommended Level: 4 |
|
»
Experience Points: 16 |
»
Recommended Party: Mario,
Mallow |
| |
|
|
|
Croco is not too hard if the
party is on level 3. To start,
Mario must use his Fire Orb
technique learned on level 3.
Croco's tail will be burned, and
he'll have to use a turn
recovering. Mallow, at this
point, will seemu useless since
his regular attacks only do 1 or
2 damage.
Well, that's because Mallow is
gifted with magic. His Y-powers
are very strong. Thunderbolt
will do some good damage, and HP
Rain is useful for healing. If a
character falls at any point,
use a Pick Me Up to fully
restore them - after all, that's
why we bought them!
Croco wil lattack regularly, use
bombs to inflict high damages,
and will heal himself with a
Wierd Mushroom. He may take a
while to defeat, but with a
steady diet of attacks and
Mallow healing, Croco will go
down rather quick. He'll give
back the green coin (Frog Coin)
after the battle.
Item received after battle:
Wallet
-----End of Boss Battle-----
After Croco is defeated, a
trampoline will fall from the
sky. Jump on it to go back to
the save point at the beginning
of the level. Use it, exit the
level, and head back to the
Mushroom Kingdom. |
| |
|
| |
|
